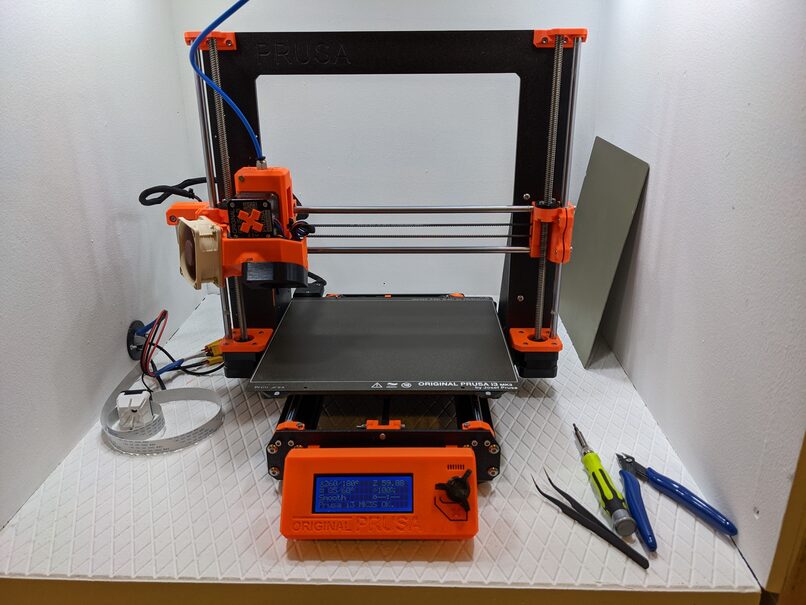
This article describes a very simple way to level the bed on a Prusa MK3/S/+ virtually for free. I’ll show you how you can use a beer can to make metal shims, and then easily install those shims to achieve a nearly perfectly flat printing surface on your Prusa. I will also discuss the reasons to do (or not to do) this, and compare this method to the fairly popular “Nyloc Nod”.
Why Level The Bed? Don’t We Already Have Automatic Leveling?
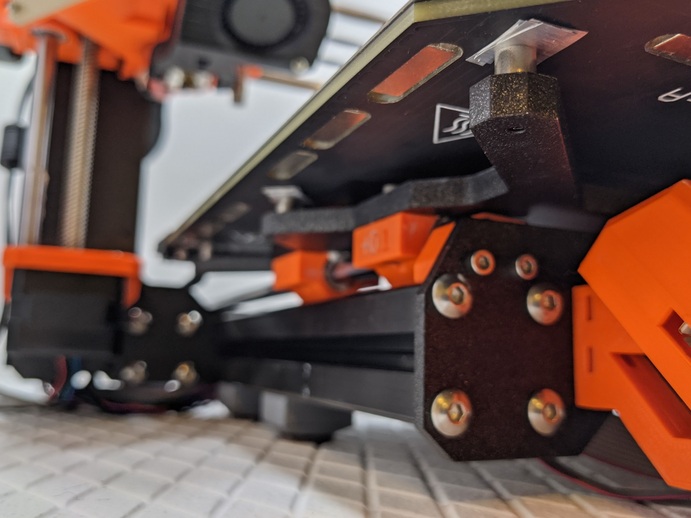
Prusa MK3S has automatic bed leveling with a fantastic PINDA probe. It works very well. So, invariably, in every discussion about physical bed leveling, somebody ridicules the idea, stating that it solves a non-existent problem.
Physical bed leveling and automatic bed leveling solve two different problems. Automatic bed leveling makes sure that a print finishes successfully, even if the bed is not perfectly level. It does that by moving the extruder up or down during the print, compensating for any measured inaccuracies of the print bed. The important point is that, if your bed is unlevel, then the resulting print (even though it will complete successfully) will be crooked.
This may or may not be a problem, depending on what you print with your 3D printer. If you only print things like baby Yoda statuettes, Mandalorian helmets, or vases, then you don’t need to physically level your bed. If you print mechanical parts that are supposed to fit together (or fit with some non-printed parts), then it may be important for you to be able to print straight parts. In that case, you need to have a print bed that is physically fairly straight and level.
Beer Can Mod vs. Nyloc Mod
Nyloc Mod has been a very popular method for leveling the print bed on a Prusa MK3. It has several problems:
- The Nyloc nut can drift. Nylon’s thermal expansion and contraction is quite significant, and, over time, will lead to the nut drifting on the bolt (probably away from the bed). This will result in loss of adjustment.
- Installing the Nyloc Mod is not too complicated, but it is somewhat tricky. You need to keep the main bolt still, while tightening the nyloc nut against the table. If you don’t tighten it sufficiently, the bolt will be free to rotate, and the adjustment will be lost.
- One may need to purchase the Nyloc nuts and a 5.5 mm crescent wrench, required for the Nyloc Mod.
- Nyloc Mod requires disassembling the print bed, but Beer Can Mod does not.
- Undoing the Nyloc Mod is a lot of work; removing the shims would only take a couple of minutes.
I am speaking from personal experience. I had the Nyloc Mod installed on my printer, and got the adjustment down to 0.04 mm of variance across the bed. When I measured again a few months later, the variance shifted to 0.9 mm across the bed.
What You Need for Beer Can Mod
- An empty beer can.
- A drill and a 3.5 mm drill bit (or a 9/64″ drill bit; you may get away with a 1/8″).
- Two small scrap pieces of wood (I used pieces of a 1×2″ board).
- Two clamps, a ruler, scissors, tweezers, a pencil.
- Small piece of medium/fine sandpaper (I used 220 grit).
- OctoPrint or some other way to connect to the printer via the USB cable.
- Optionally: nine 10 mm M3 Torx head screws to replace the stock hex head screws.
The Objective – 0.1 mm Variance Across the Bed
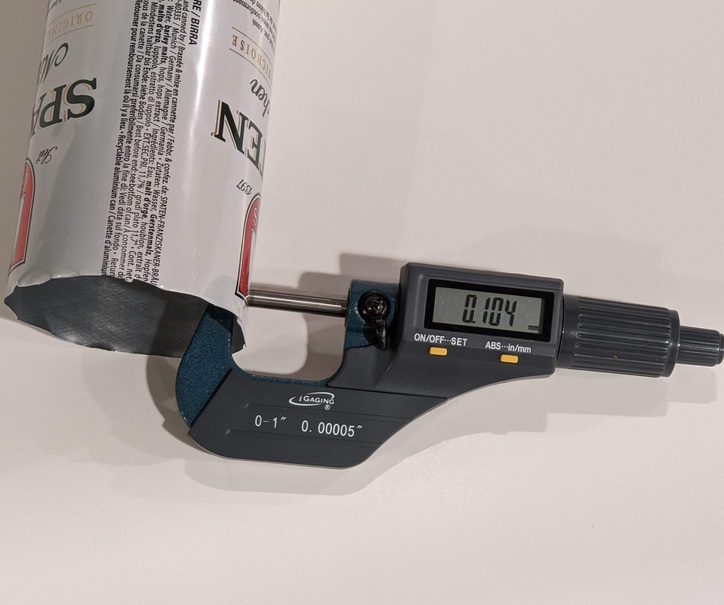
I set the objective to be 0.1 mm variance across the bed. The main reason for that is that the the aluminum foil used to make most beer cans is almost exactly 0.1 mm thick. Since I won’t have any thinner shims, this will be the limiting factor for accuracy I can achieve.
The second reason is that, having done bed leveling before, I know that it should be quite easy to achieve 0.1 mm variance. The third reason is that I, subjectively, believe that this is good enough. Varying temperature of the bed can easily deform it by 0.1 mm, so it’s not worth it to aim for better accuracy, unless you only print in one material. It is possible to achieve better accuracy with this method, but you would need to have shim stock of various thicknesses and spend a lot more time adjusting.
What Exactly Do We Mean by Bed Leveling?
Redditor zsouthboy pointed out to me that leveling is a misnomer, and that the proper term is tramming. But if I said tramming, most people in the 3D printing community would not understand what I meant. So, to be clear, we are doing two things in this guide:
- Adjust the bed to be parallel to the printer’s idea of the XY plane, to within 0.1 mm across the bed.
- Adjust the bed to be physically flat, to within 0.1 mm across the bed.
Step 0 – Ensure Your Bed and Build Plate are Clean
Since we’ll be measuring to fractions of millimeter, any dust, pieces of filament, or other debris between the print bed and the build plate will register as variance. It’s absolutely important that both the bed and the build plate be very clean, every time you take a measurement. Also, try to remember which side of the build plate was facing up the first time you took the measurement, and always place it with that side up for the subsequent measurements. This will make measurements more meaningful.
Step 1 – Initial Evaluation
If you are lucky, your bed may already be within the target 0.1 mm of variance, and you would not need to do anything. For most of us, the bed will be off by more than that. If you measure initial variance greater than 1.5 mm, I suggest, at first, double-checking that your build is correct, and that everything is square and tight.
For this first step, you need to choose how you are going to be interacting with the printer to measure your print bed. The easiest way is to use OctoPrint with Prusa Bed Leveling plugin. If you don’t have OctoPrint, you can issue G-code and read the results through a terminal, by connecting your printer to a computer. I will not cover this here, but, essentially, you’d need to type “G80” into the terminal, then wait for the printer to finish, then type “G81” to see the results. You can read this guide to see it in action.
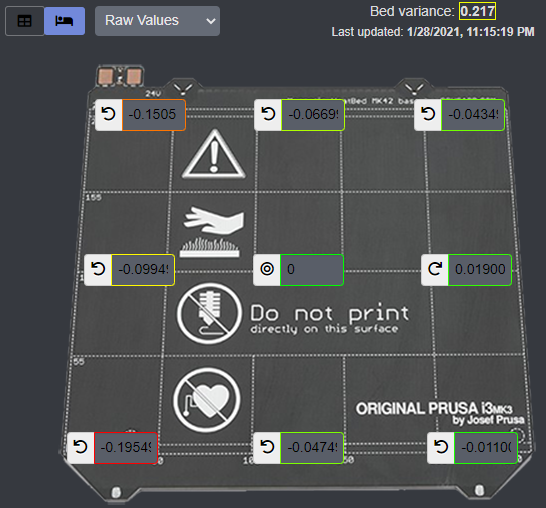
Switch to the Prusa Leveling Guide tab in OctoPrint, select the preheat temperature (I chose PLA), and click “Begin Adjusting”. Here are my initial results:

As you can see, my bed is off by roughly 0.6 mm across the entire surface. My aim is for it to be less than 0.1 mm off. I see that the right side of the bed is already within my 0.1 mm target. The left side is drooping down by half a millimeter.
Step 2 – Find the Highest Point of the Bed
Unlike the Nyloc Mod, the Beer Can Mod can only adjust the bed up, by adding shims. This means that we need to find the highest point on the bed, and then raise the rest of the bed to be within the desired accuracy (0.1 mm in my case). On my printer, the center is the highest point. I can guestimate that I’ll need 14 shims, five under the far left screw, four under the left middle screw, and five under the front left screw.
Consider making the center the highest point of your bed, if it is not already. This is the hardest point to reach, and it would make your life easier if you did not need to shim it more than once.
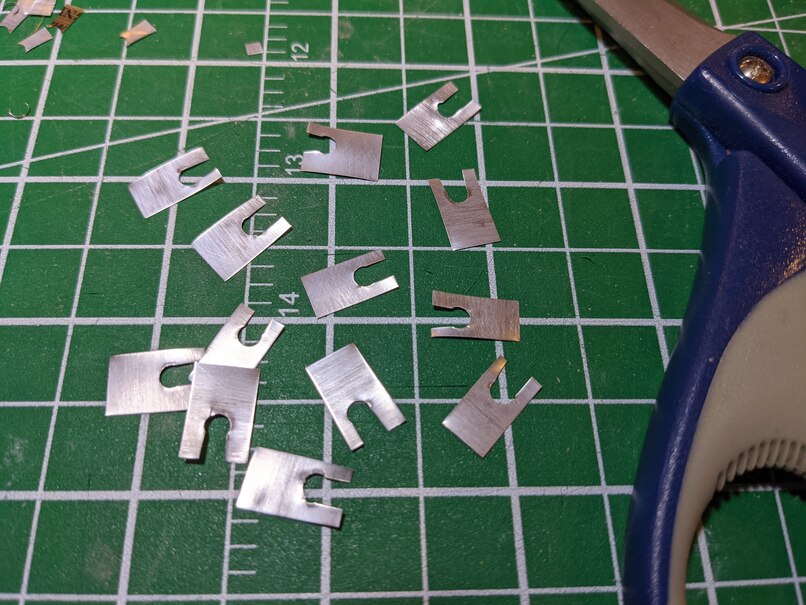
Step 3 – Let’s Make Some Shims
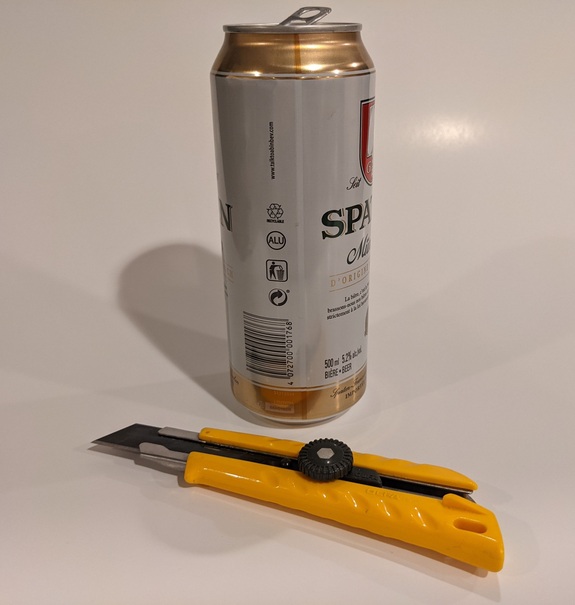
Cut the beer can open. You can poke a hole through with a utility knife, or a pocket knife, or the scissors. It does not matter how you do it, but cut off the top and the bottom. You want to get a nice rectangle of uniformly thick foil from the middle section.
Next, clamp the rectangle between two pieces of wood, aligning one edge of the rectangle with the edge of the wood blocks. Draw a line about 6 mm from the edge, and mark centers of the holes to drill, 8 mm apart:
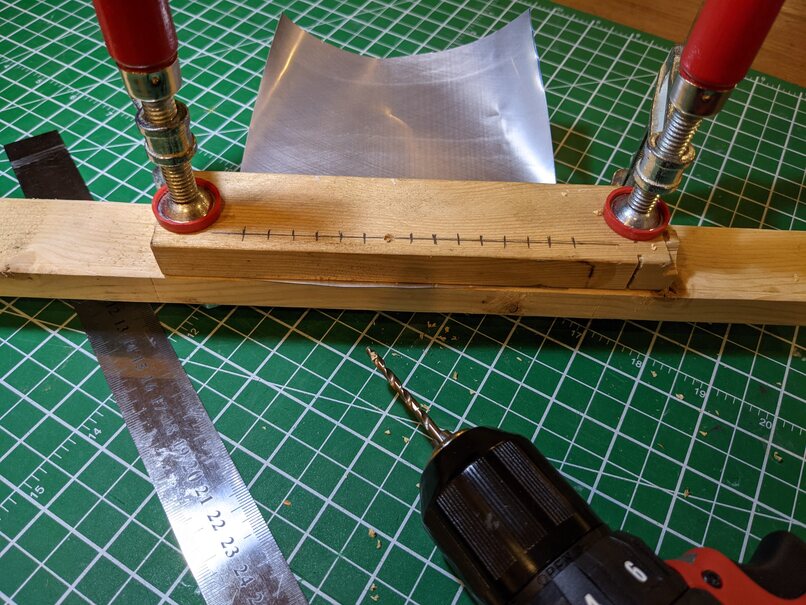
Then drill the holes using a 3.5 mm drill bit. You don’t need to drill through the lower piece of the wood, just make sure that you drill deep enough to go through the foil.
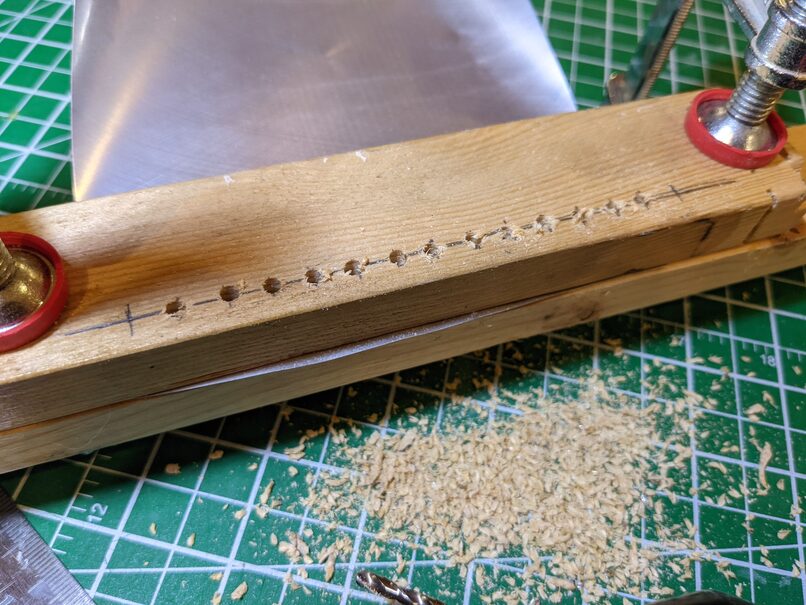
Open the clamps and take the foil out. You should have a fairly neat row of holes, roughly 8 mm apart on center. Use a piece of medium/fine sandpaper to sand away any burrs created by drilling, on both sides of the foil. You can see that my holes are not evenly spaced. This is because I was not holding my drill straight when drilling. This is not too important.
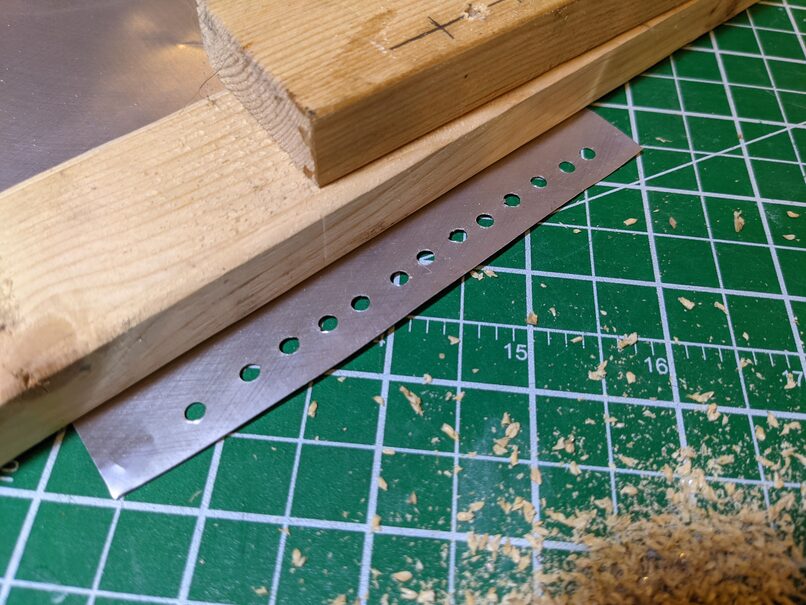
Now cut an opening leading to each hole with scissors. Cut off the strip with with the holes, leaving roughly 5 mm margin. Straighten the strip by bending it the opposite way to its natural bend. You want your shims to be flat.
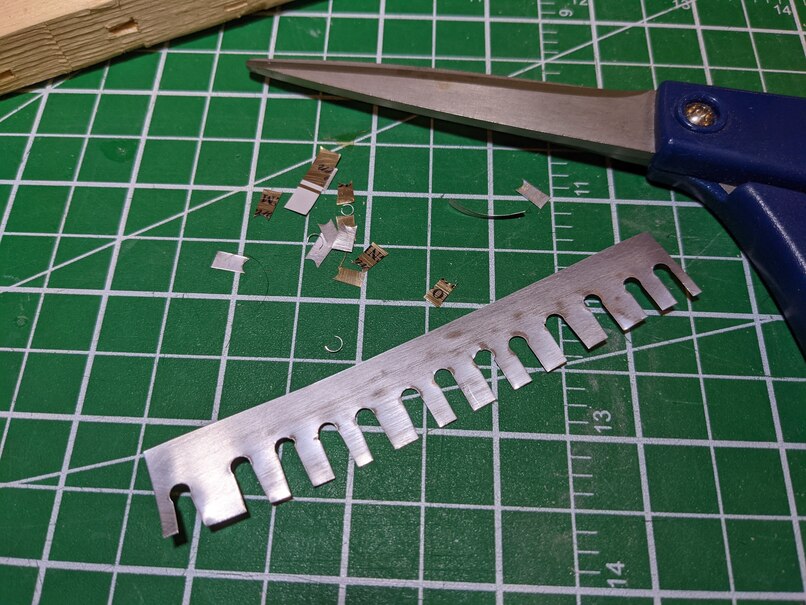
I then thought that the tabs were a bit too long, so I trimmed them by a few millimeters:
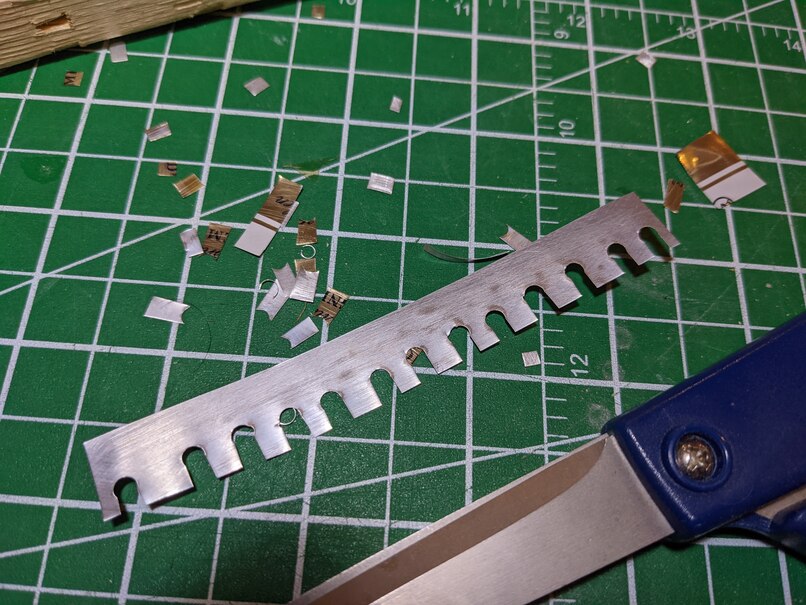
Now cut with scissors roughly in the middle of each tab. We are done making the shims:
Install the Shims
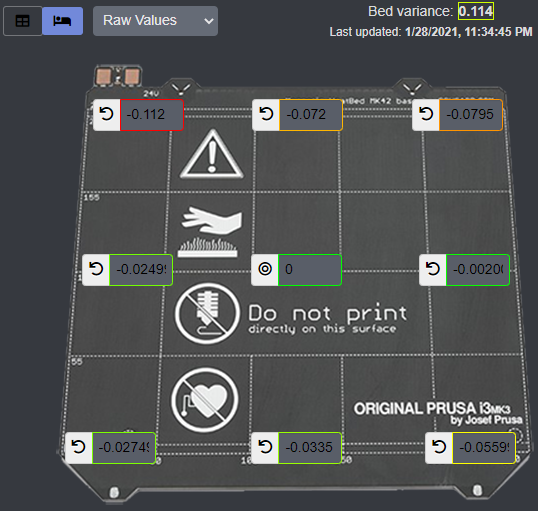
At first, I installed four shims under each of the three screws along the left side of the bed, tightened the screws, and took another measurement. Inserting shims is easier done as a stack, holding the stack with tweezers, and lifting the bed up with a finger to make space for the shims.
Note that because the shims are not perfectly flat, and because the entire bed reacts to the insertions of shims (not just the isolated point of the bed), inserting N shims under a screw may result in a measurement different than N x 0.1 mm. Additionally, adding a shim under a screw may affect the measurements for neighbouring screws. Here is my measurement after the first round of shims installed:
As you can see, the bed variance decreased by 0.3 mm, so we are on the right track. I then decided to add one more shim to far left screw, one shim to the middle left screw, and two shims to the front left screw. I tightened the bed screws again, and took a measurement:
The bed variance improved again, but the far left corner is still below the target of 0.1 mm variance. So I’ll add one more shim to the far left screw:
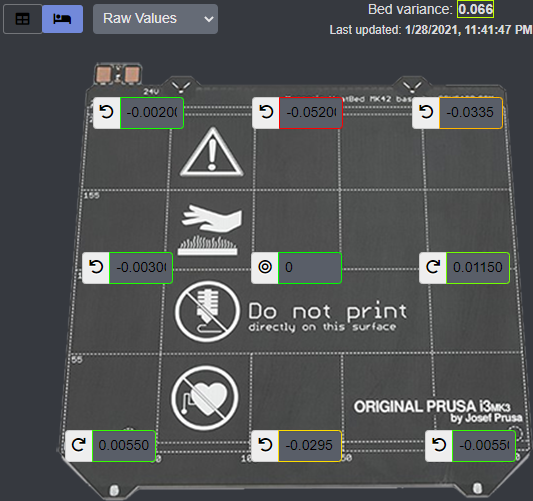
Bingo! The variance across the bed is now 0.07 mm, which is within my target accuracy range. Here is what the shims look like installed:
Conclusion
At this point, you can try taking more measurements at different bed temperatures. Think what materials you usually print, and try those settings. If you have other build plates, try them as well, at different temperatures. If you see that the bed deviates greatly at some temperature, consider redoing the adjustment at that temperature.
Keep in mind, that no adjustment will be universally accurate at all ranges of temperatures, so you should expect that, at some temperatures, the bed will warp beyond the 0.1 mm accuracy achieved by this method. For most people this is probably okay. I consider the 0.1 mm variance at PLA temperatures a good starting point. At ABS temperatures my bed warps to 0.14 mm variance, and I am at peace with that.
Let me know if you find this guide useful, or bump into any issues. If you feel like it, you can buy me a coffee.
Hi
What a easy and novel idea, I did the Nyloc mod and experienced the drifting which you mentioned , I’m definitely going to remove the Nyloc mod and try this, as this is frustrating me beyond note, as a question have you experienced much noise vibration from the shims when for example going from PLA to PETG or ABS as the bed warp/variance changes as you also mentioned
Hi, Armand, thanks for commenting.
I there is no noise or vibration due to the shims. The screws holding the shims in place are tightened very well, and there is absolutely nothing related to the shims can move.
I’ve observed different warp with different temperature and the steel sheet variations. There is no way around it, but I kind of stopped obsessing about this after a while. This mod feels more like “set it and forget it”, compared to Nyloc.
He he you got thick can of beer. Mine is only 0.07. In my case it was perfect. I had also tried the nylock. But removed it after an hour of testing. Like Armand, the noise was driving me crazy. The noise also indicated free movement in the threads. With the nylock, you take three G81 in a row and you get big difference. With the beer can mod the three G81 tests gave me almost identical ones. And no vibration. I solved finally all my problems with this mod. Thanks a lot.
Thanks for leaving a note, Guy. Glad the mod worked for you!
Beer! or coke would work well