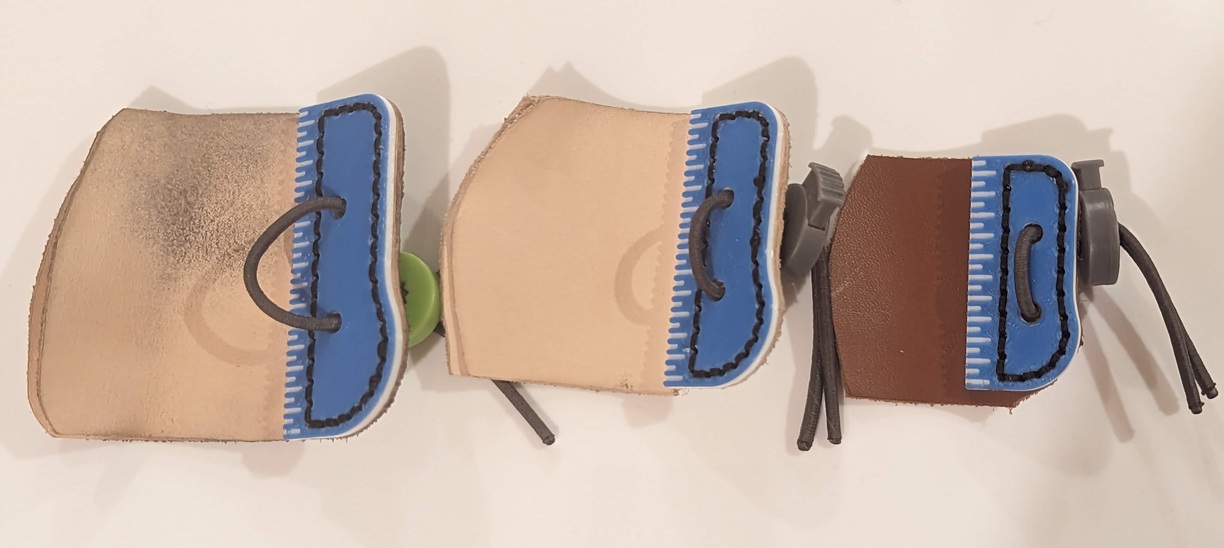
I designed and made custom three-finger finger tabs for barebow archery. I needed finger tabs in three sizes – for myself, my 14 years old son, and my 11 years old daughter. For the insert with the scale, I’m using a 3D printed plate, which also serves as a stitching template.

Design and Materials
The main design element is the insert. It acts as a scale for the aiming technique that involves “crawling the bowstring”, but it also acts as a stitching template for even stitch length.
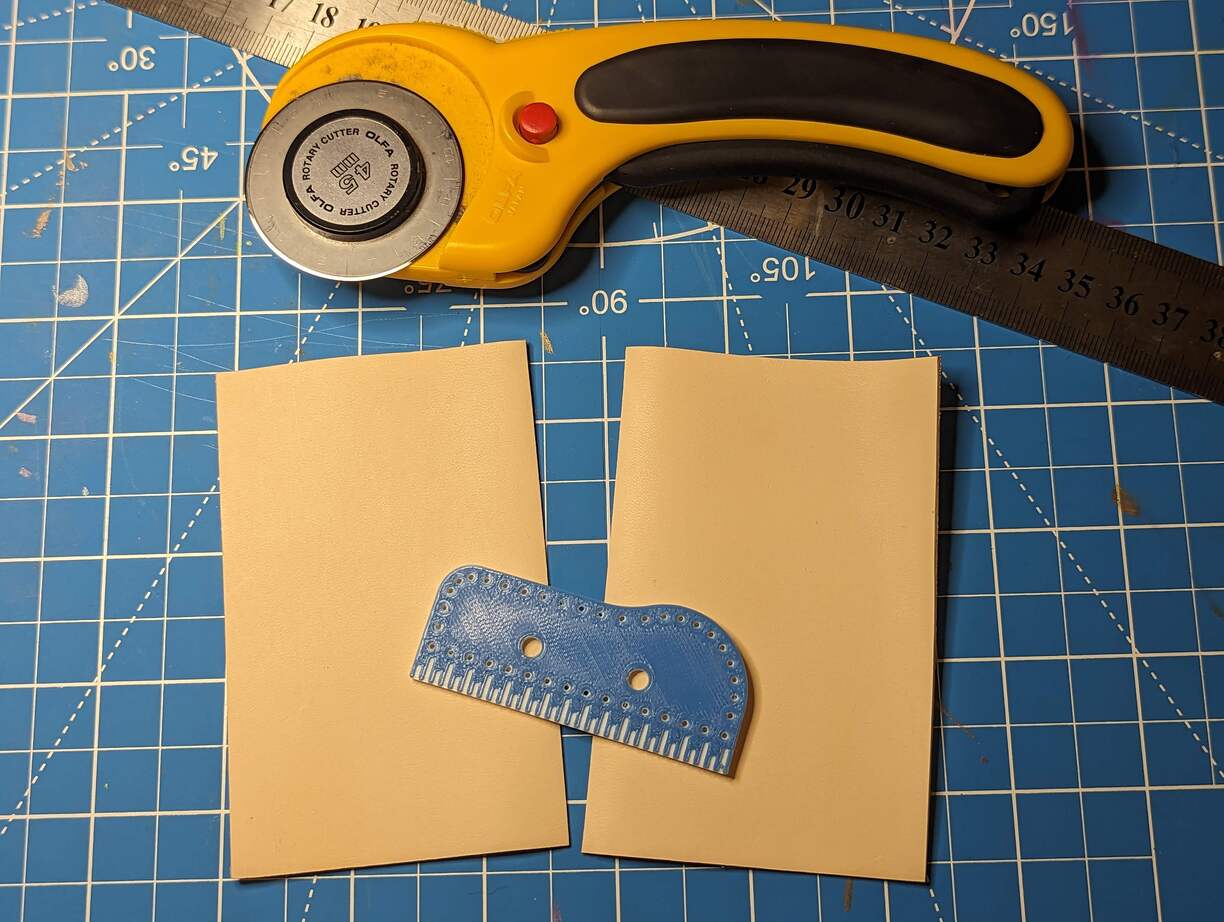
You need a large enough patch of leather to make the finger tab. For thickness, the recommendation is 1 mm of leather thickness for each 5 lbs of bow draw weight. I.e. 4mm for a 20 lbs bow. 6 mm for a 30 lbs bow.
You also need some waxed string for leather working, two needles with the eye large enough for the thread, and an awl.
3D Printed Part
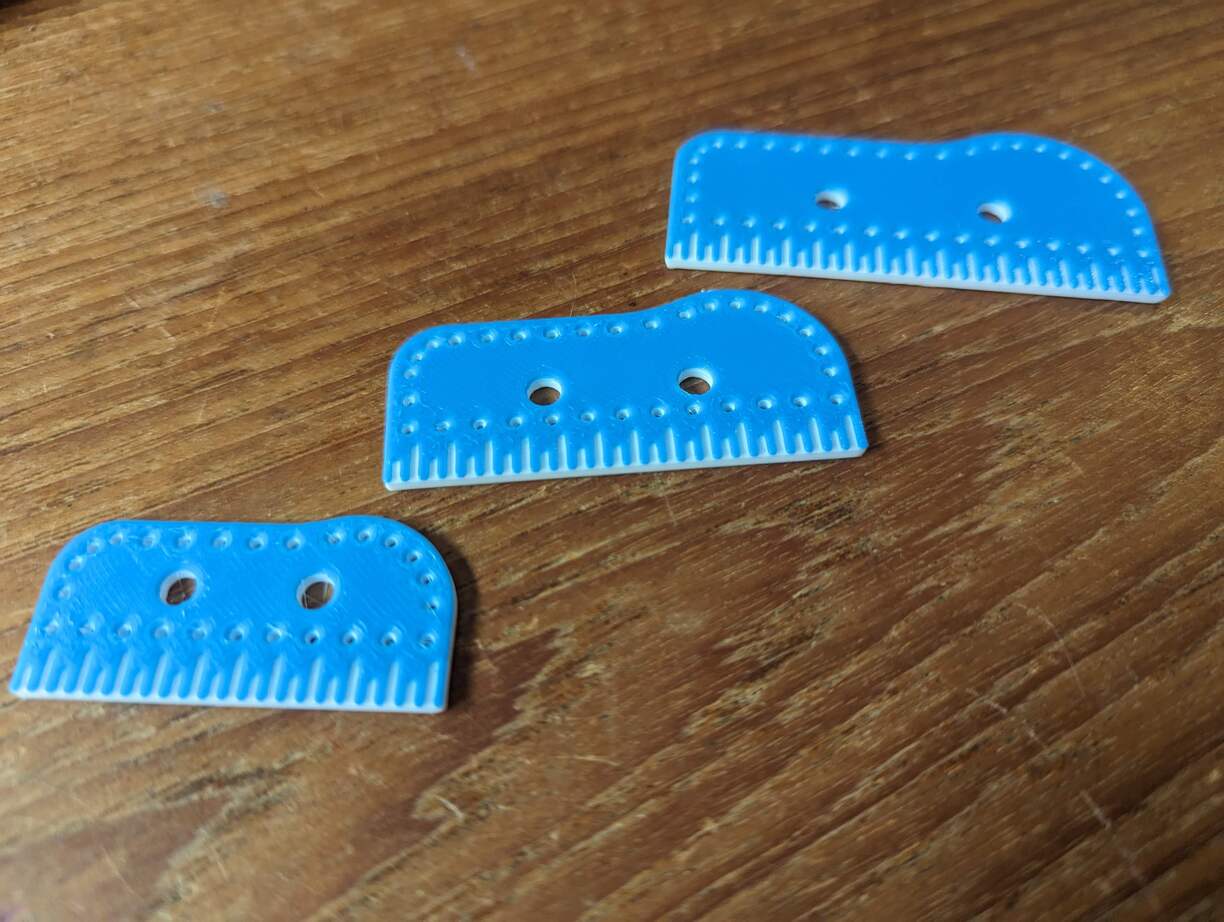
I provide six STL files for the inserts. Three sizes, each in right handed and left handed versions.
Choose your size by measuring the height of the three fingers used to draw the bowstring. If you are thinking of scaling the insert, I suggest picking a smaller one and scaling up, rather than scaling a bigger one down. This is because scaling down may make the lines of the scale too thin to be printed reliably.
My printer (Prusa Mk3S) allows pre-programming filament change in the slicer. The printer then beeps and waits for me to change the filament color. I heard that for printers that don’t support that, there are still some tricks to make them pause and change color. The inserts are much better printed in two colors, but you can also print them using one color, and then use a permanent marker to fill in the lines of the scale.
After printing, use a 1.5 mm or a 1/16″ drill bit to clean up the stitching holes.
Adding Leather
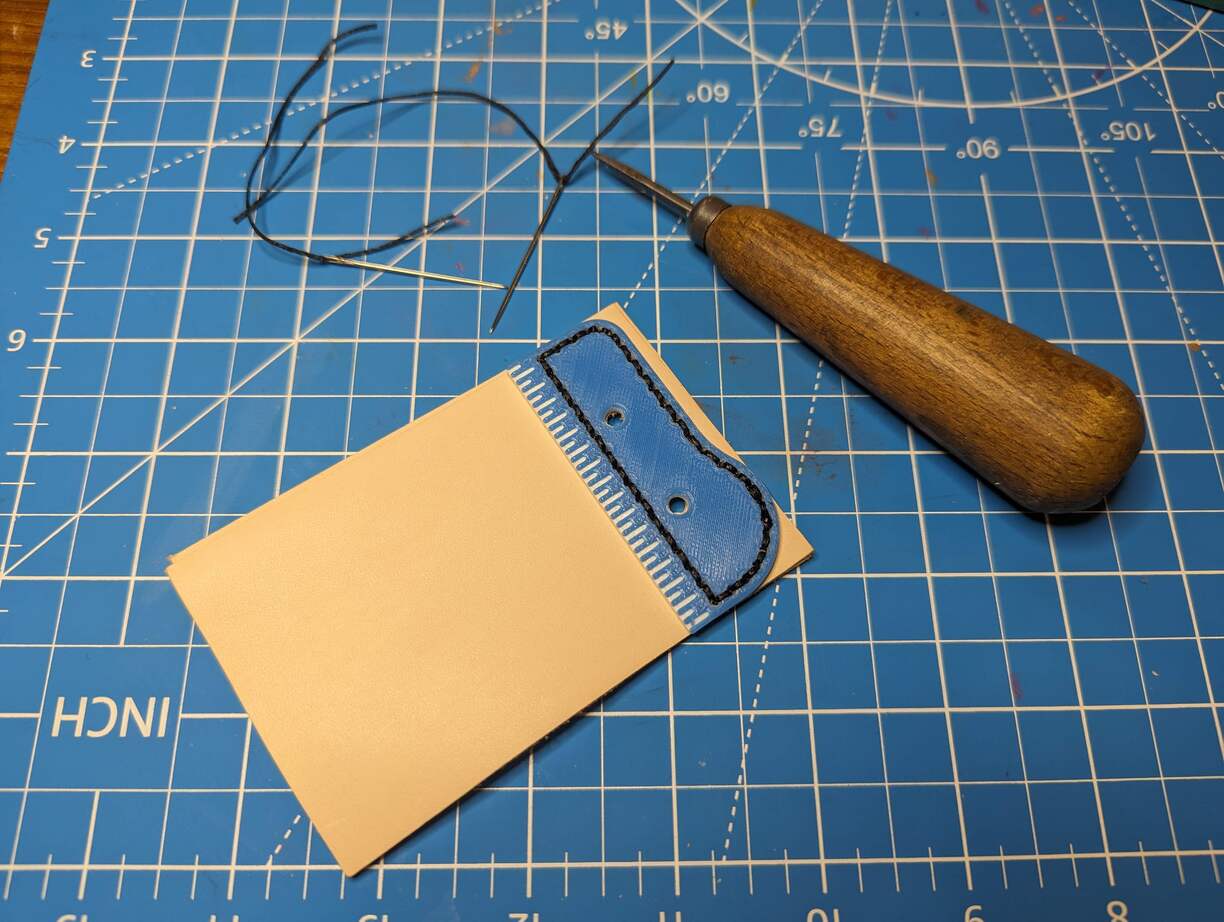
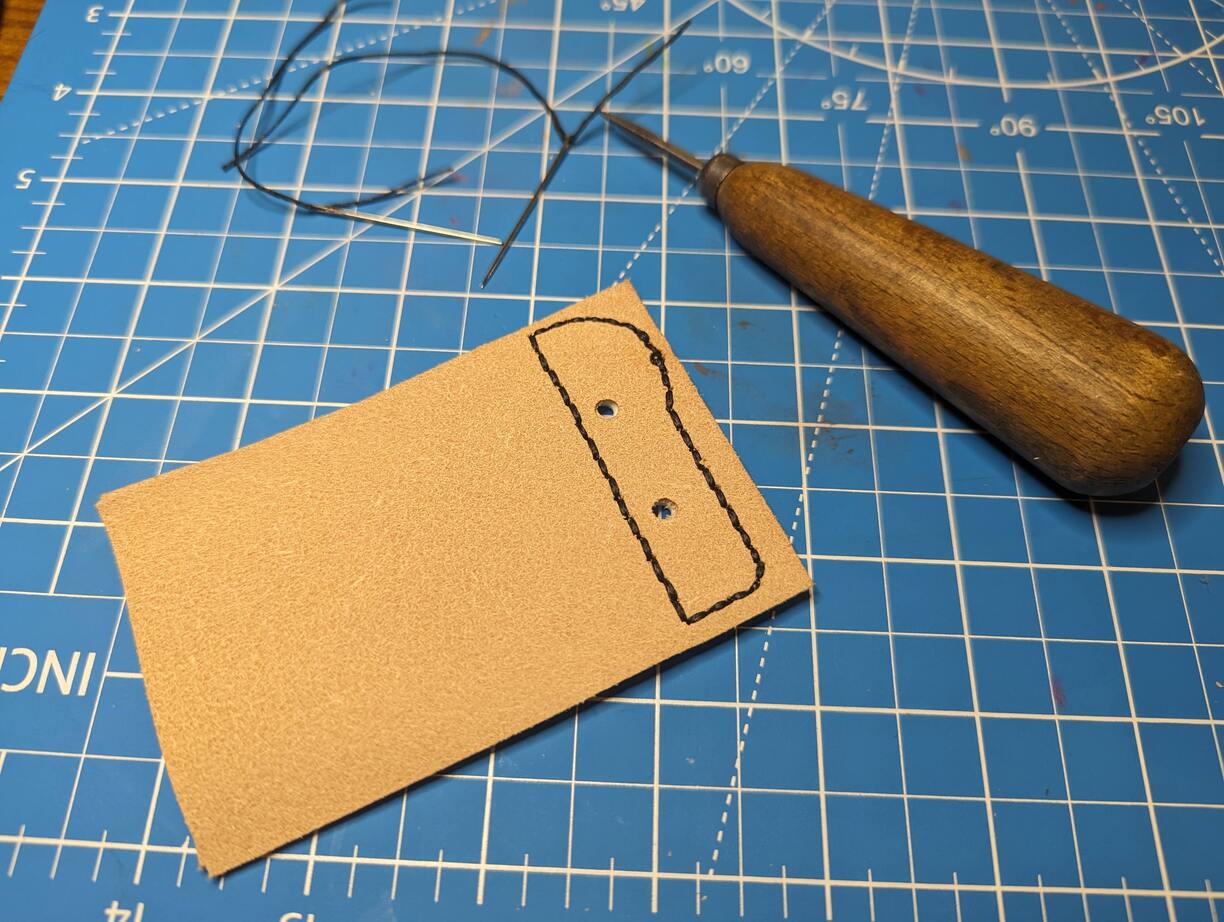
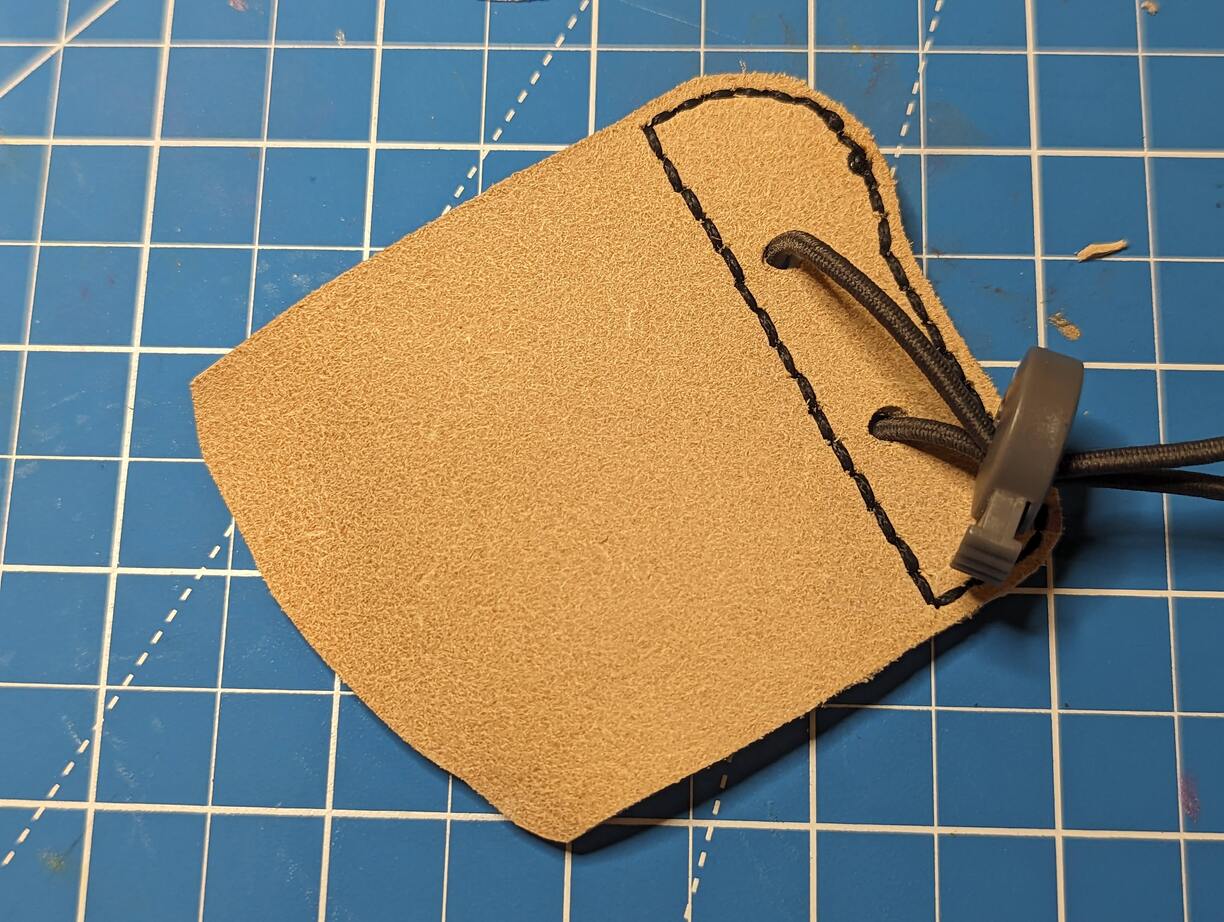
Carefully punch the holes through the leather using an awl, and form a regular stitch using two needles and a waxed thread. Watch some videos online about basics of stitching leather if you’ve never done that.
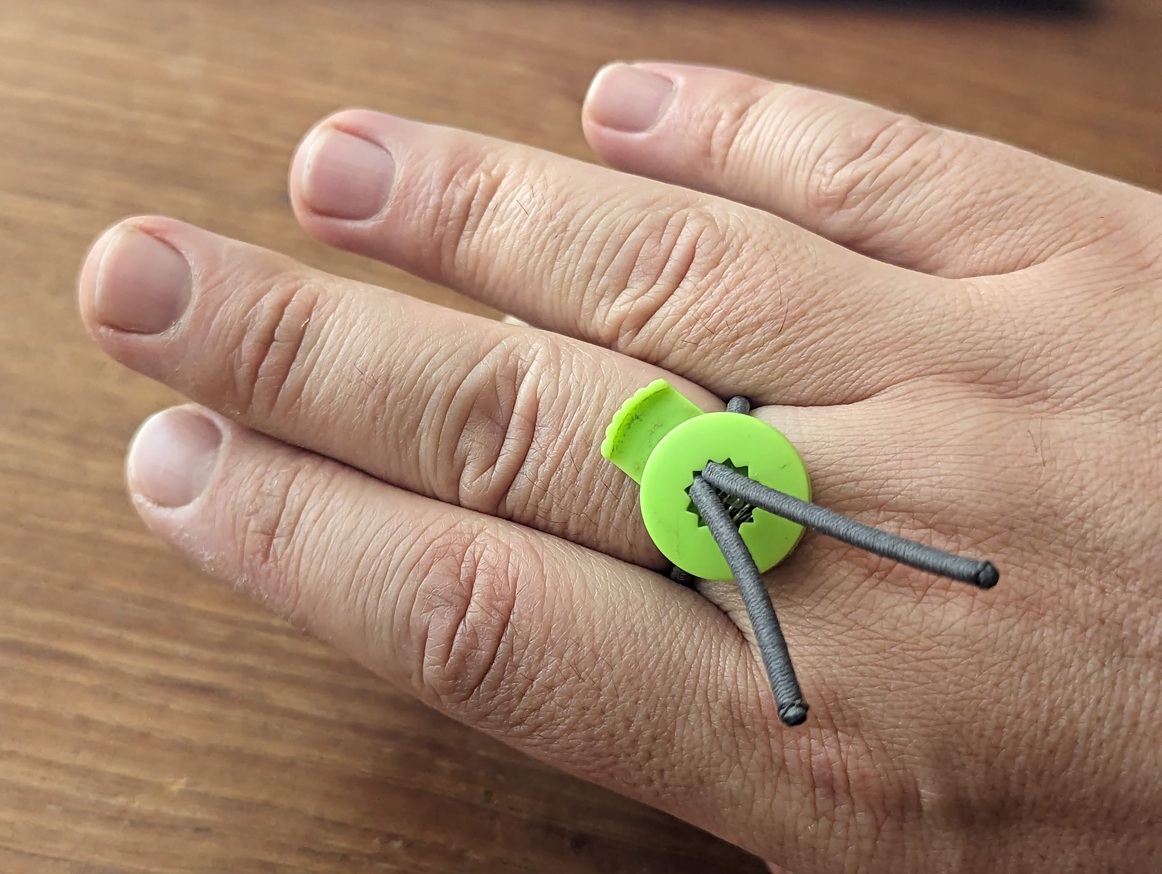
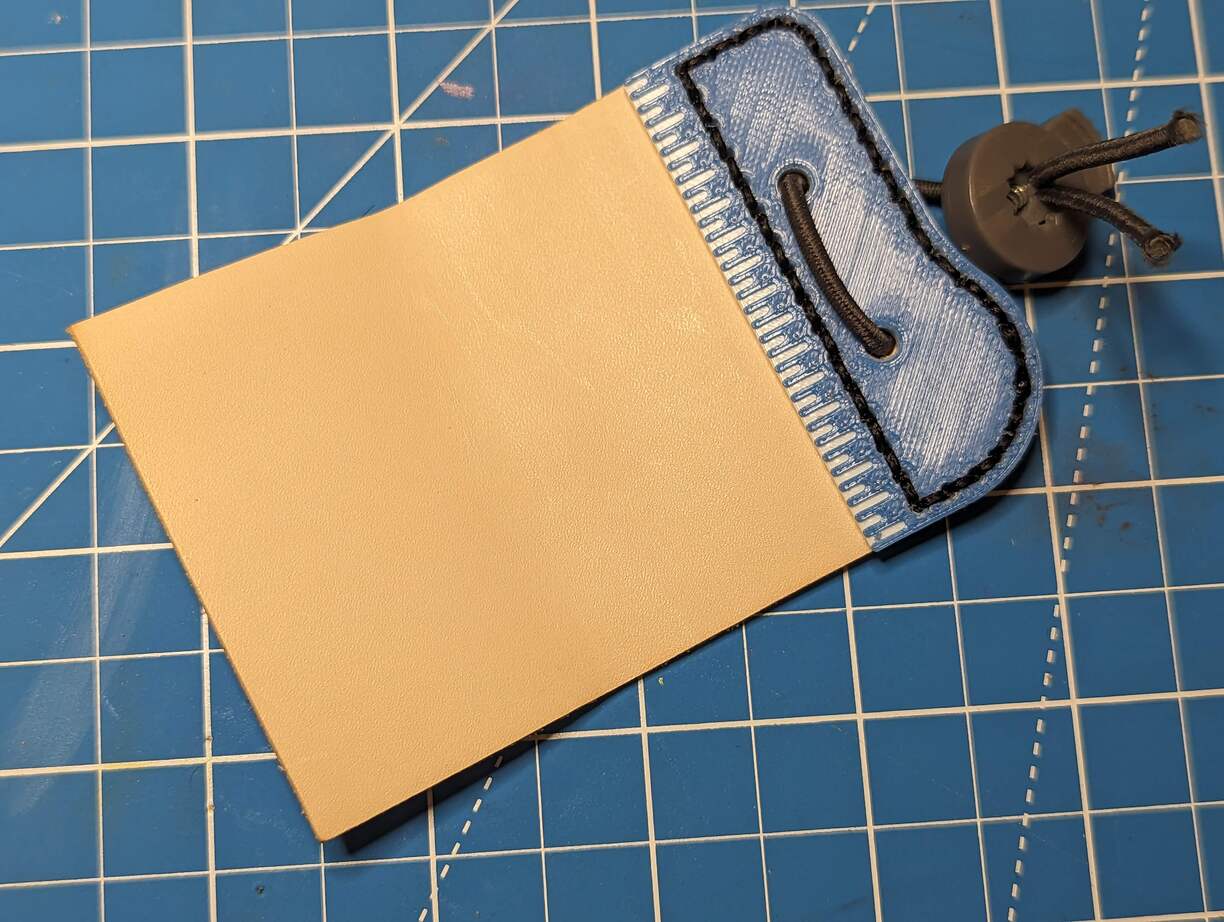
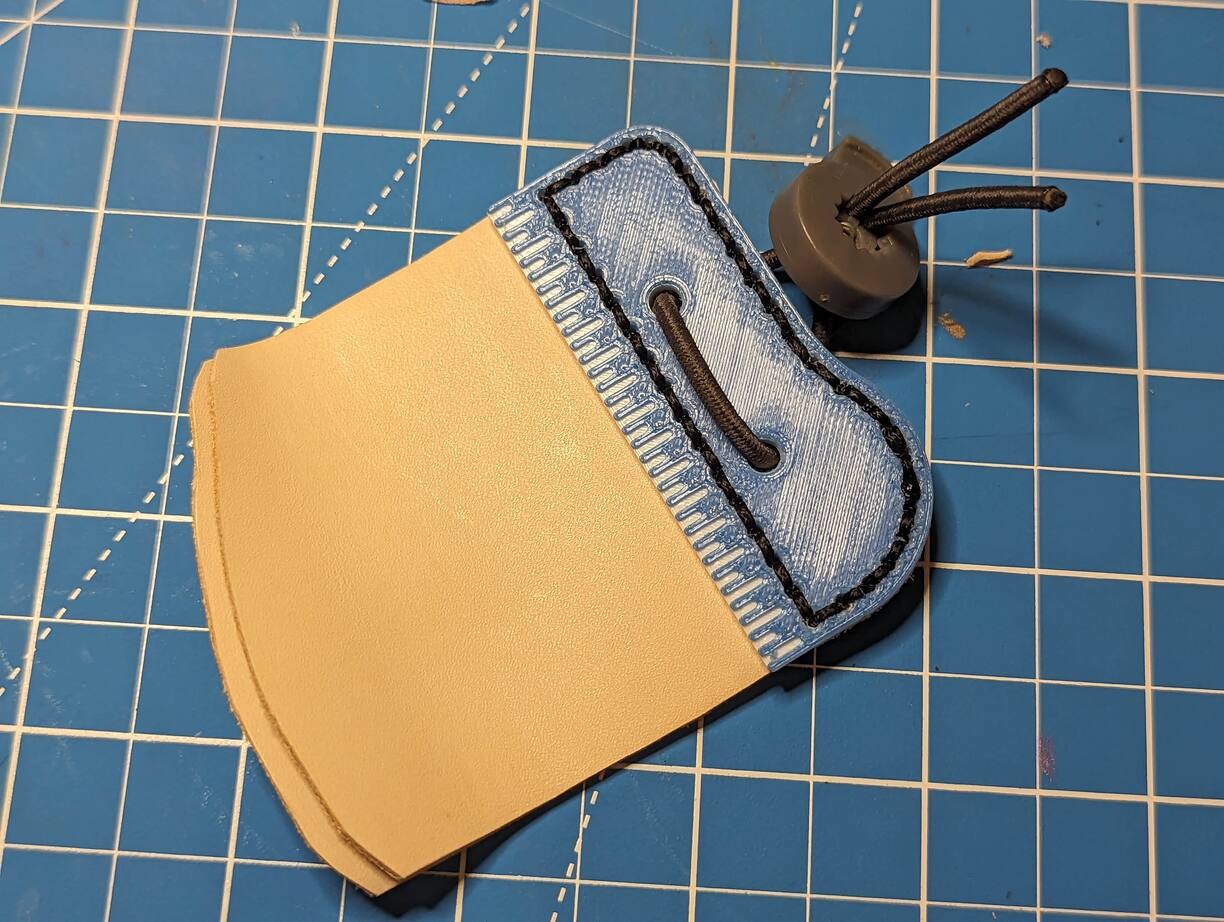
Punch holes for the elastic. Thread through an elastic loop and install the clip.
At this point, you just need to trim the finger tab to the shape of your fingers. You can watch this video on the topic, or if that video is no longer there, just search for another one.
Download the Files
You can download a ZIP file with the STL, Fusion 360, and STEP files for the models.
This model on Printables.
This model on Thingieverse.