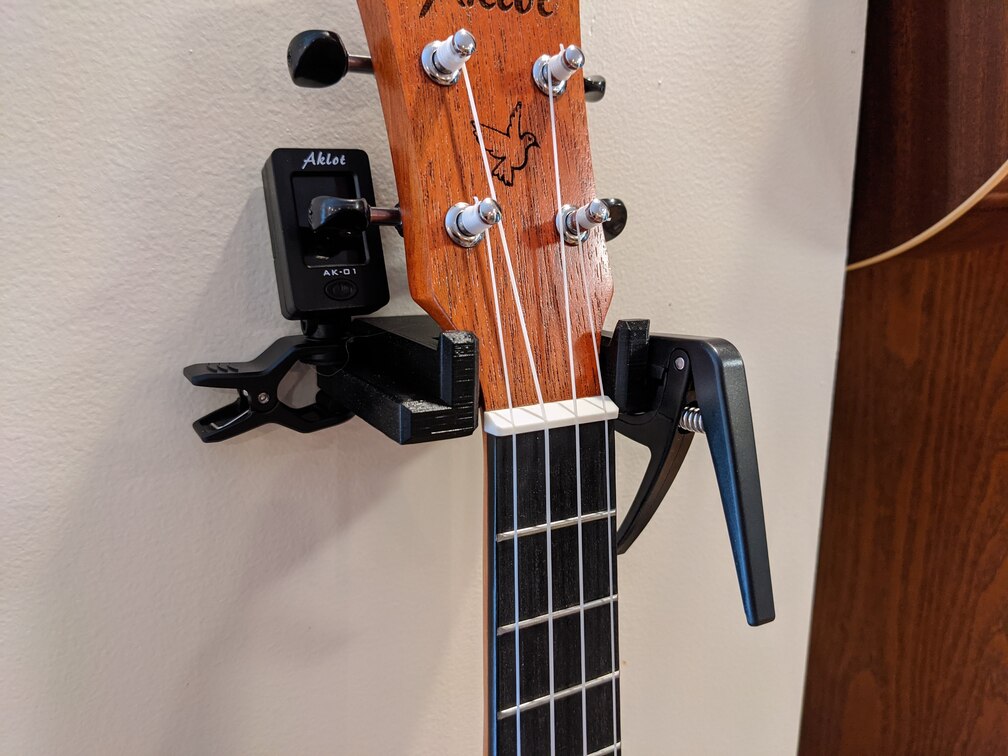
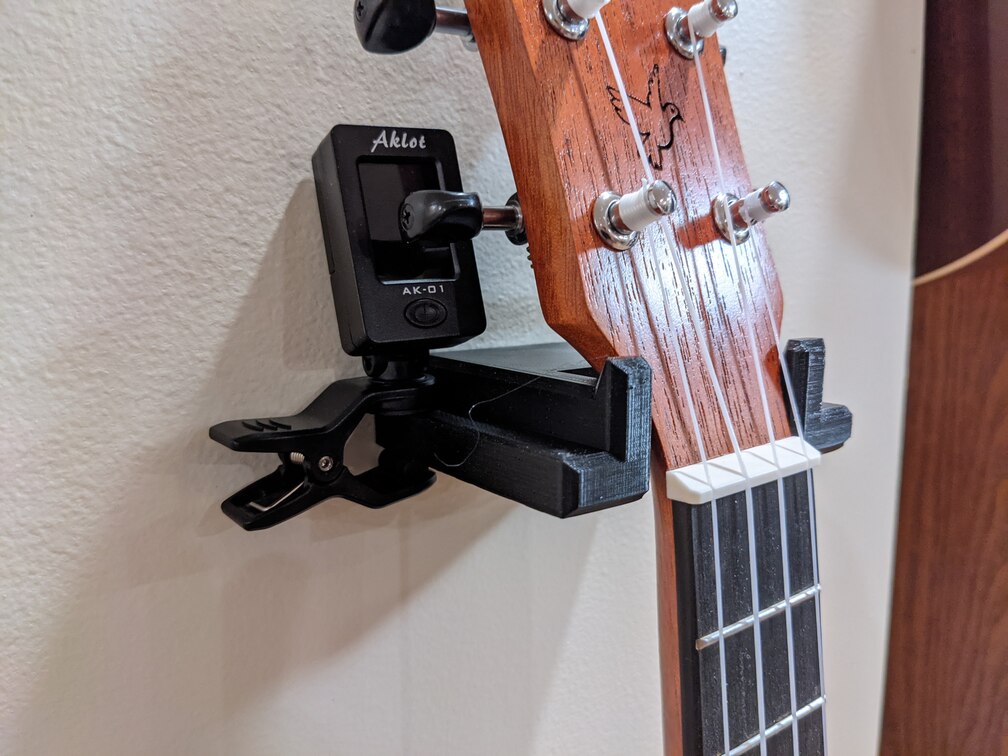
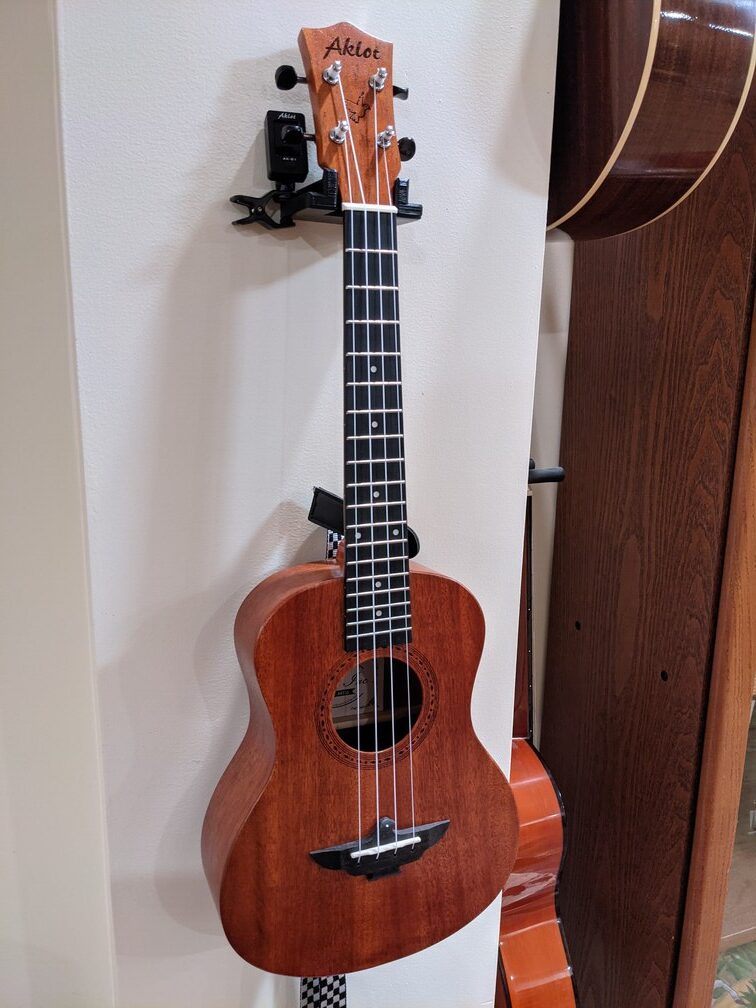
I designed and printed a wall mount for Ukulele with narrow ledges on the right and the left, to store a tuner and/or a capo. The mount works well with my Tenor and Soprano ukuleles.
Author: Arcady


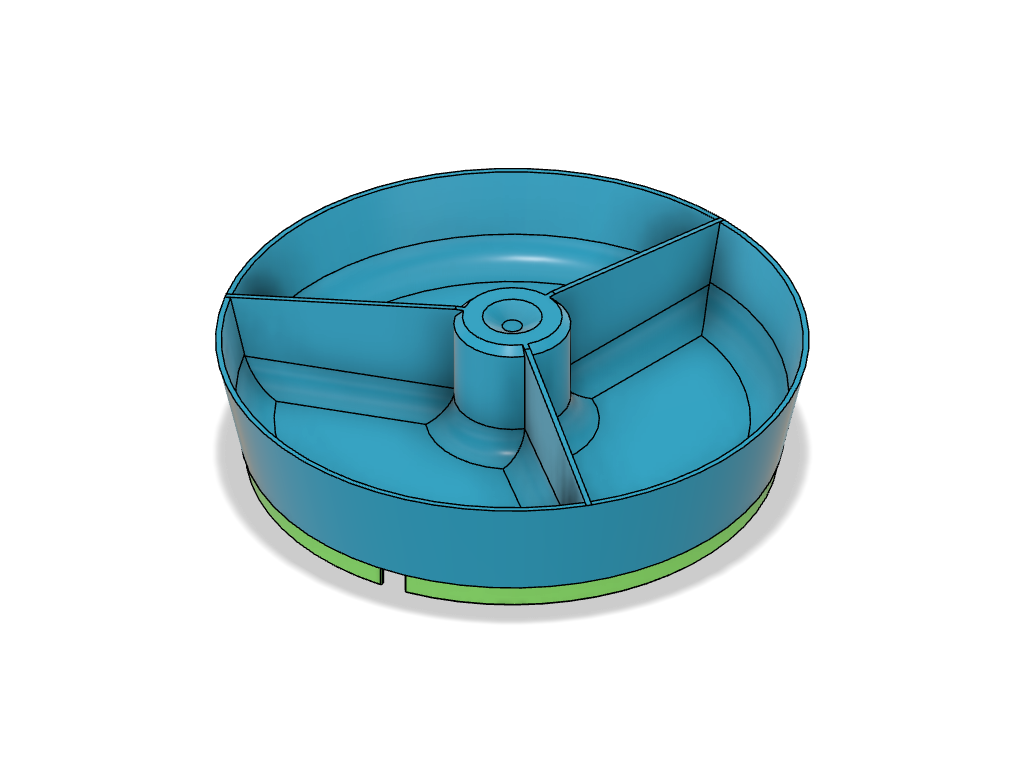
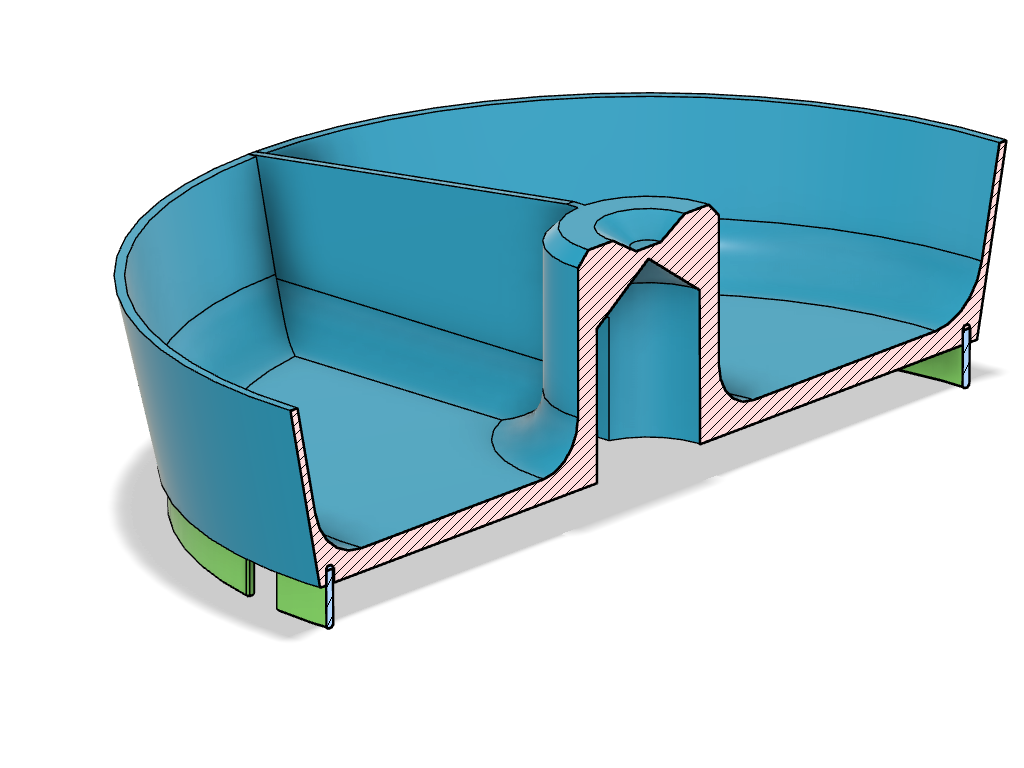
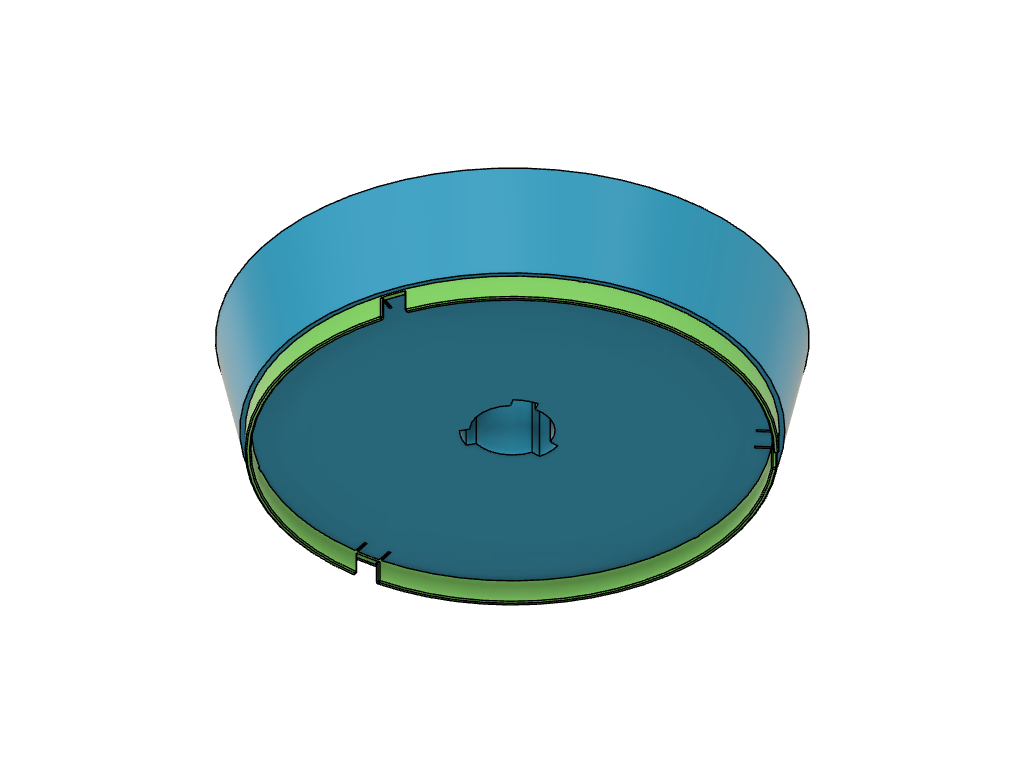
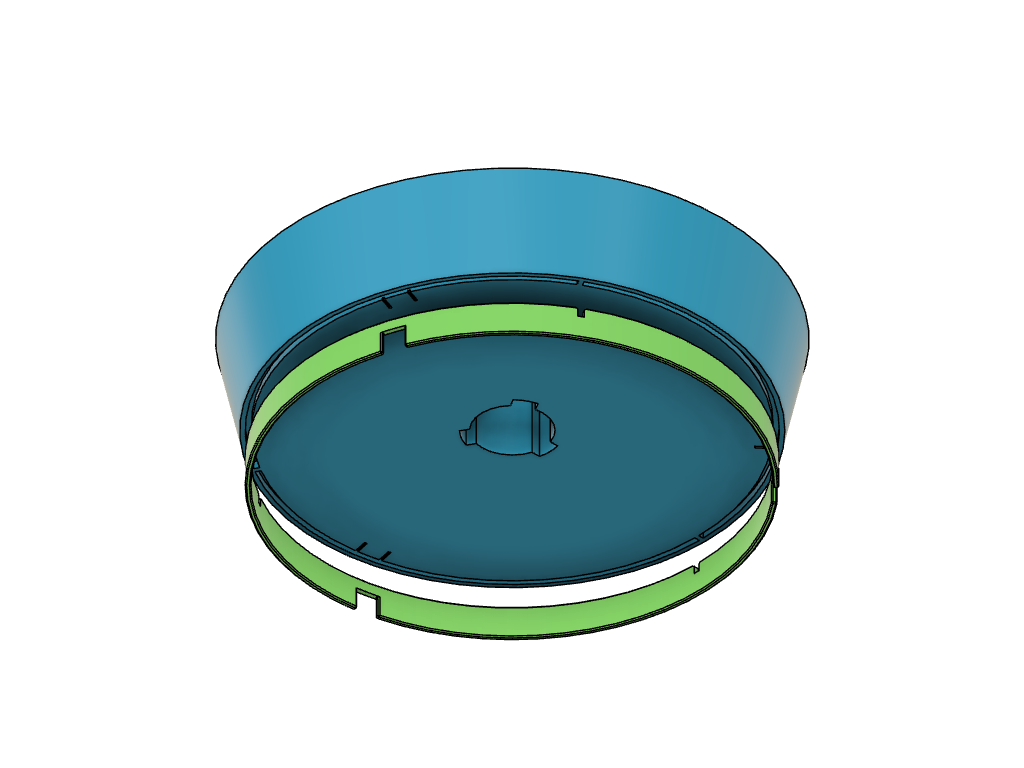
Spare Dish for Cat Mate Feeder
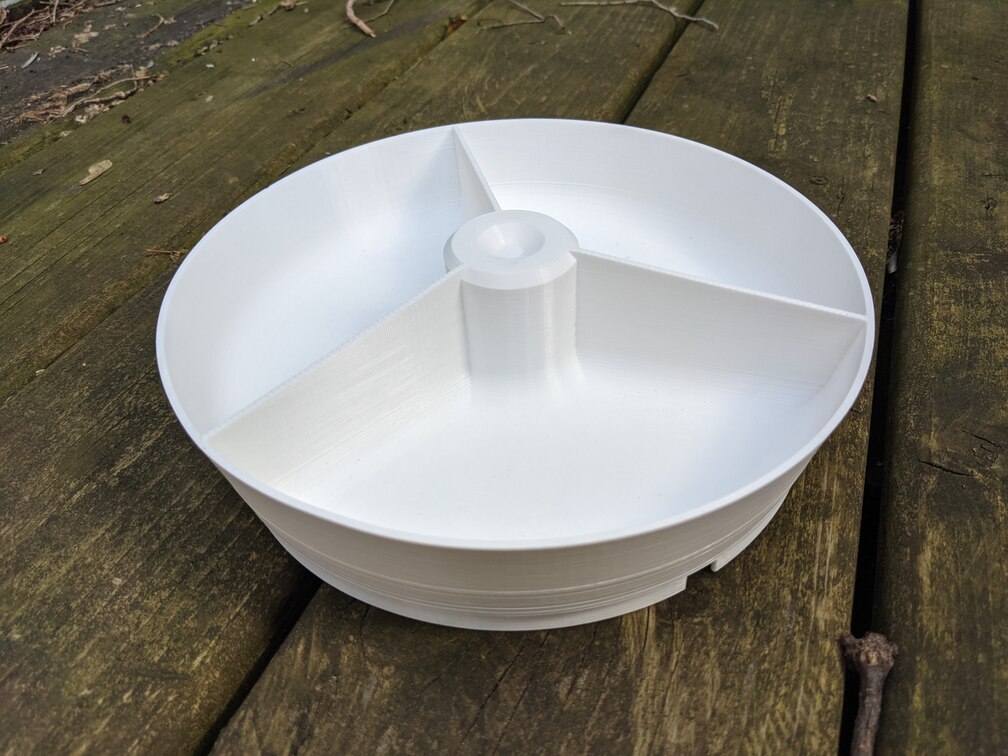
At some point, my cat figured out that she can wake me up in the morning to get food quicker. Every day thereafter, I had to get up at 6AM to feed her. I bought the Cat Mate C300 automatic feeder to address this problem, and it worked really well. Now my cat gets her food at 6AM and does not bother me about it. The only issue with the feeder is that there is no way to buy a second bowl for it. This is a problem, because I prefer to run my dishwasher overnight, and the only bowl is in the cat feeder at that time, so I can not throw it into the dishwasher.
Since there was no way to buy a spare dish/bowl for the feeder, I designed and 3D printed one. It works great, and I hope that it can be useful for somebody else, too.
Colour Collar Marker Rings for Smartwater Bottles
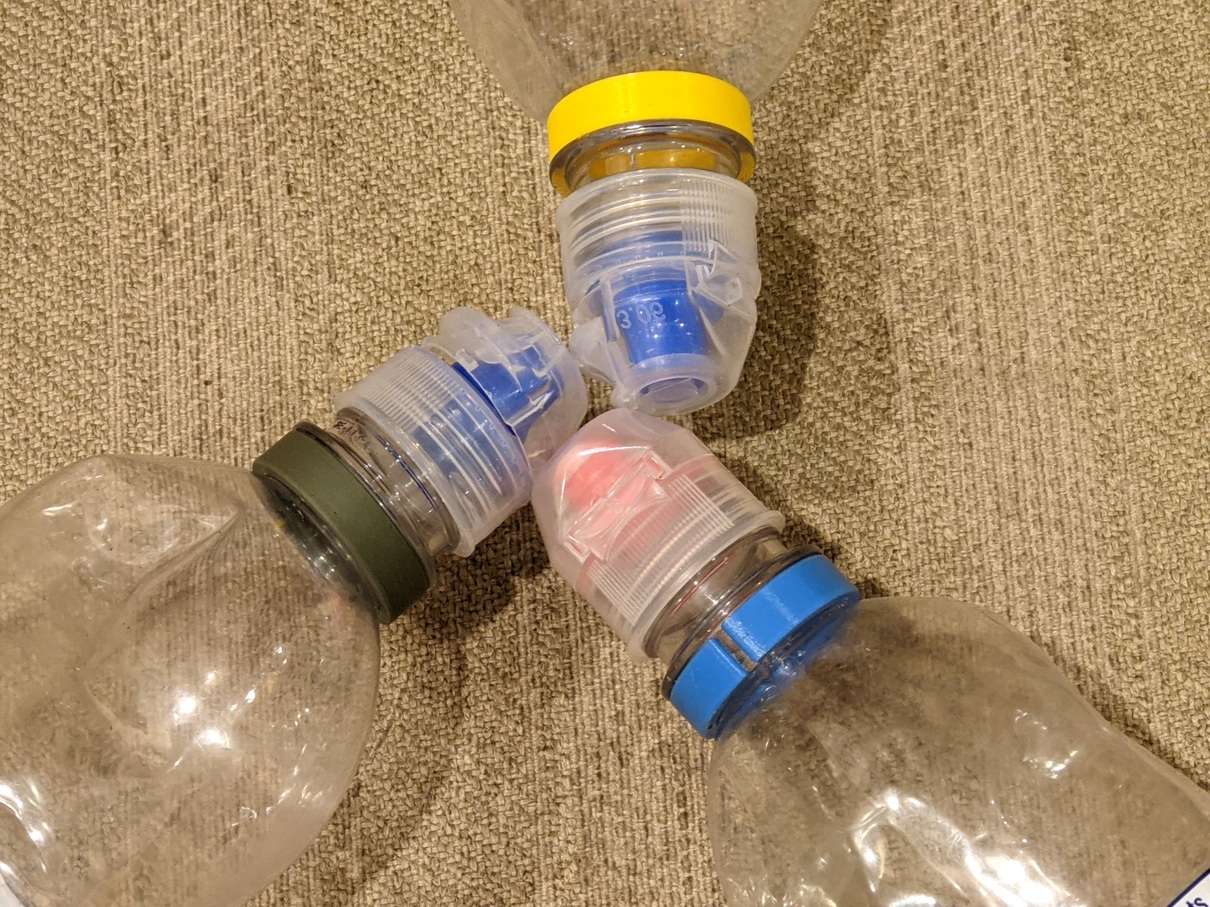
Smartwater bottles are very popular among hikers. I’ve designed these simple collar rings that snap around the neck of the bottle, making the bottles easy to mark.
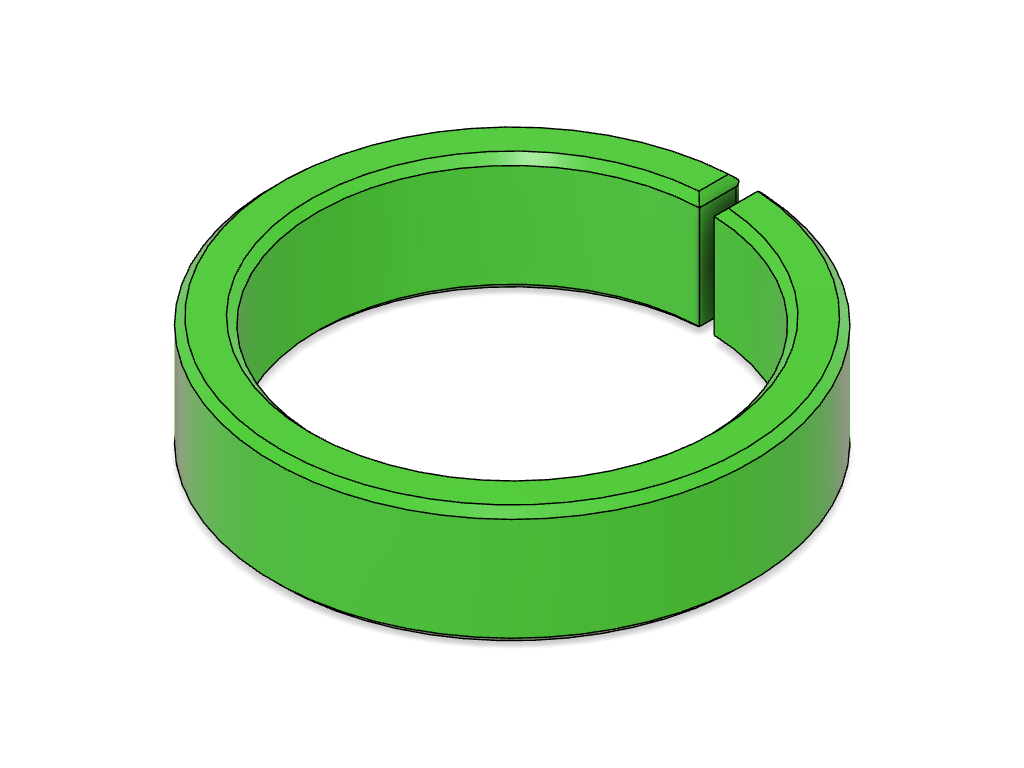
The ring is very easy to print. I used PLA and PETG, and they work equally well.
Download the STL file for the ring here:
This design on Thingiverse.
This design on PrusaPrinters.
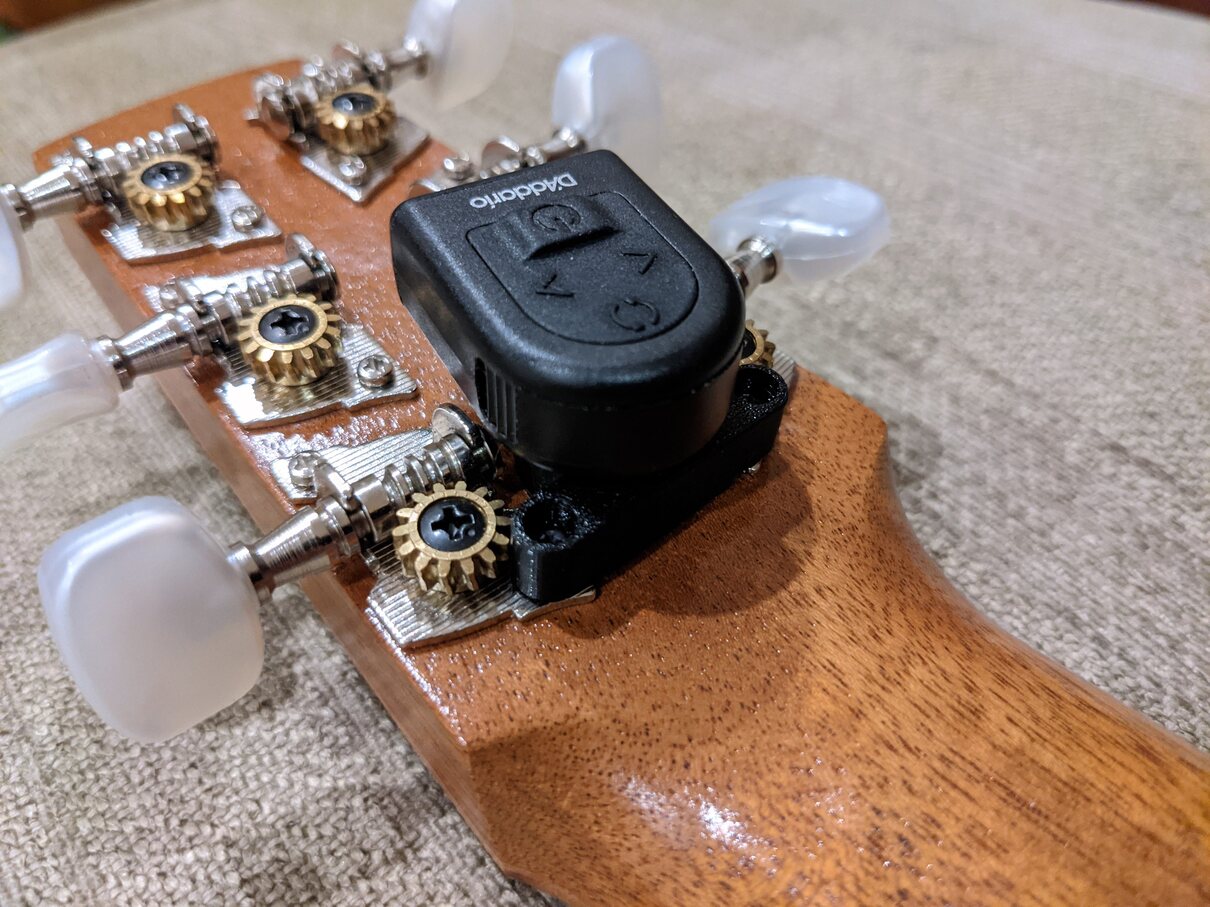
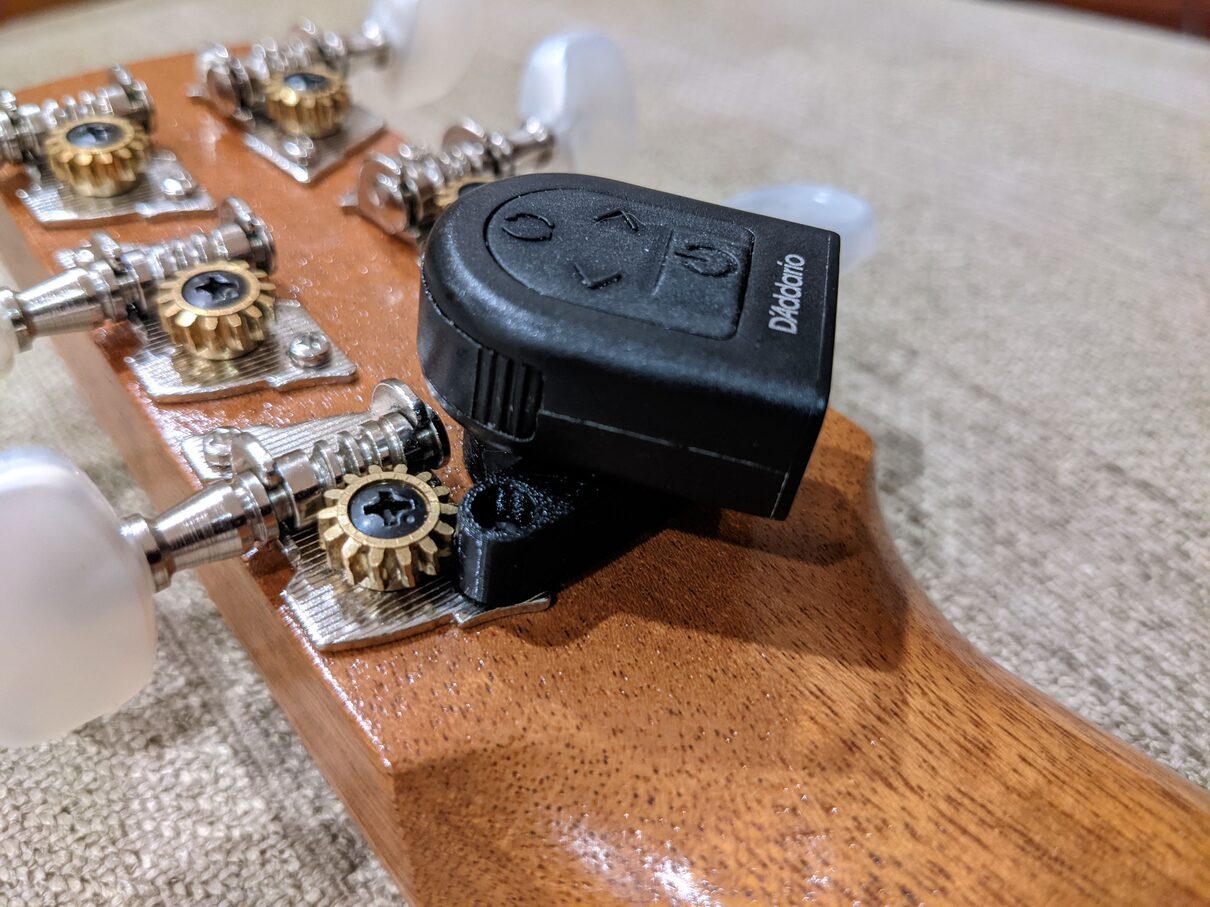
Custom Mount for D’Addario Planet Waves Clip Free Guitar Tuner
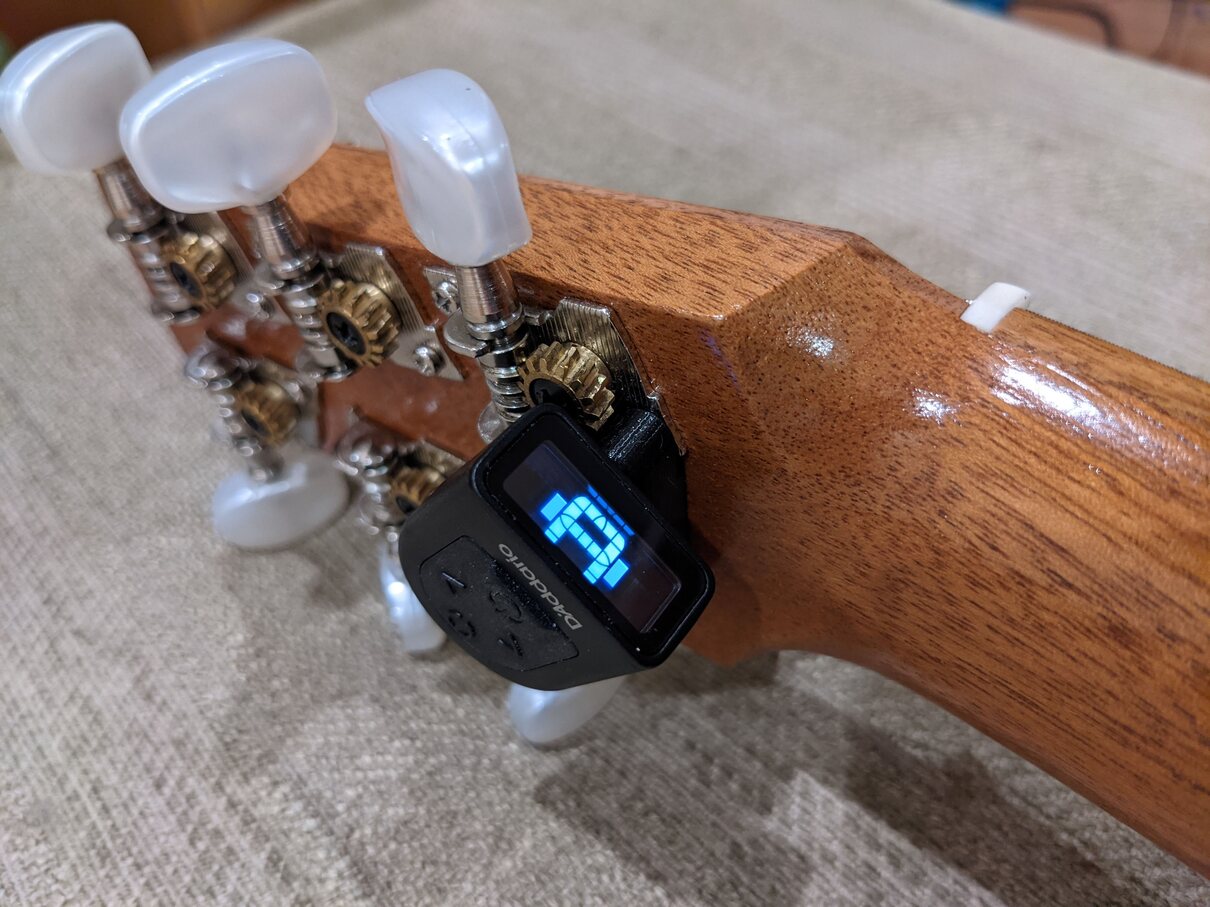
I could not mount the D’Addario Planet Waves clip free guitar tuner (model PW-CT-21) onto the headstock of my travel guitar. The headstock of the guitar is so small that there is no way to attach it so that it would not interfere with the left hand. I designed and 3D printed this custom mount for the tuner to solve that issue. The mount places the tuner in between two tuning machines, raising the tuner just above the machines. The mount attaches with the two long wood screws supplied with the tuner.
I am sharing this design in the hopes that it may be useful to someone else. It is fully parametric, and, most likely, you only need to change one parameter – btwn_mounting_holes_oc, which is the distance between the two tuning machines mount holes, on center, measured as accurately as possible. You may also want to increase the height parameter if the mount is not tall enough, and the tuner does not clear the tuning machines.
Upside Down Shampoo Bottle Stand

Here is a simple 3D model for standing a shampoo, conditioner, detergent, or liquid soap bottle upside down. The diameter of the hole for the bottle cap is 31.5 mm. If you need a stand for a different diameter, let me know, and I’ll generate it, or you can download the Fusion 360 or STEP file and modify it yourself. I printed mine in white PETG with 15% infill.
Raspberry Pi Camera Mount for Prusa MK3/S/+ MK2/S
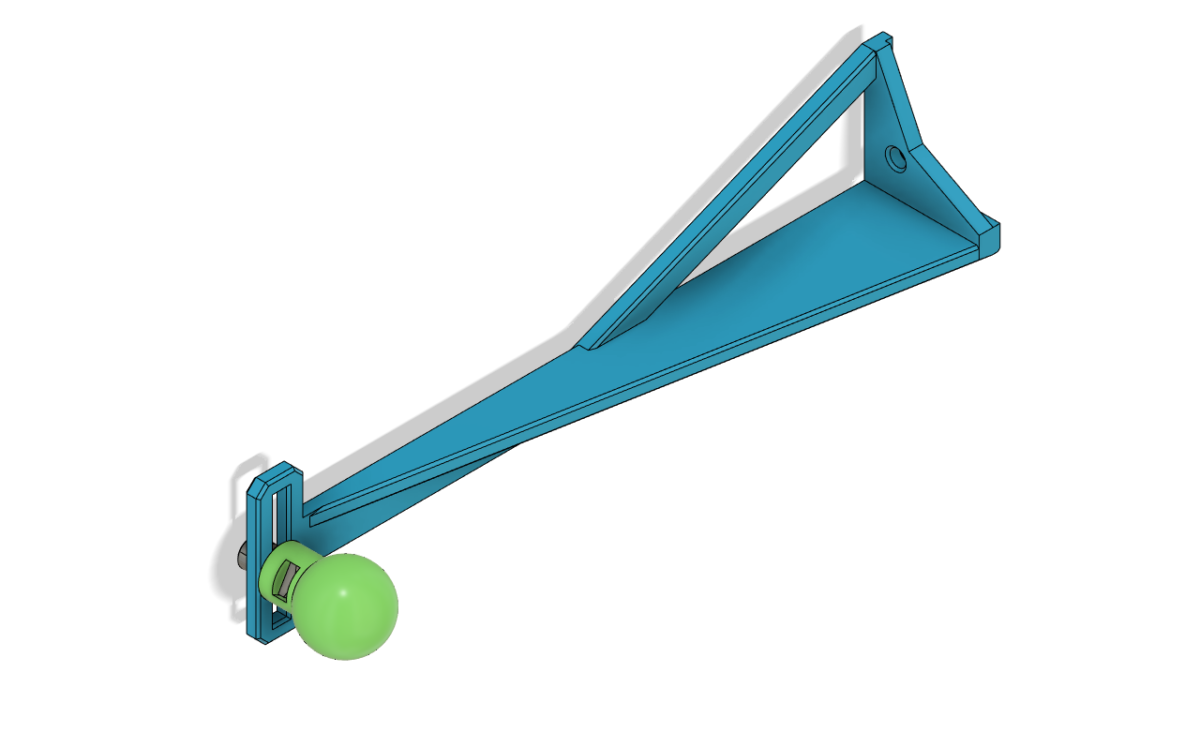
I have been using the Articulating Pi Cam mount with my Prusa MK3S. The joints between the links were coming lose all the time, and the 3D-printed screws were breaking when I was trying to tighten them. I designed my own arm for the mount, which:
- Uses metal M3 fasteners, which can be tightened properly so that they would not come lose,
- Is more than twice lighter than the articulating arm,
- Has a slightly bigger ball for the ball joint, to make that joint a little bit tighter,
- Is compatible with the camera head from the articulating arm, so if you are already using the articulating arm, you can reuse the camera case from it.
Beer Can Mod For Prusa MK3/S/+
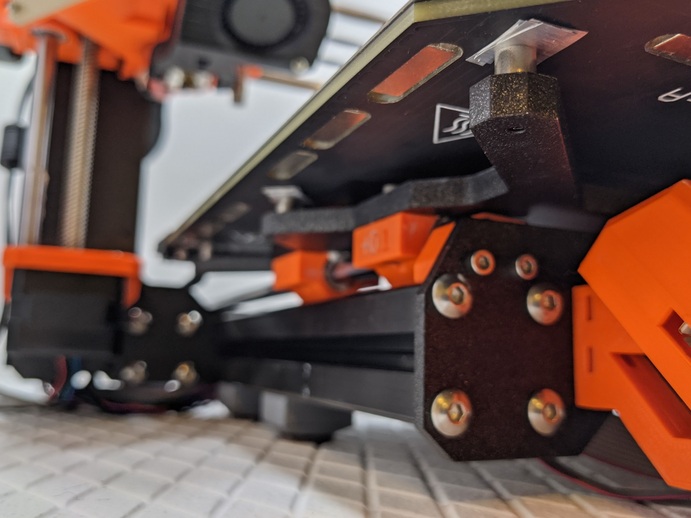
This article describes a very simple way to level the bed on a Prusa MK3/S/+ virtually for free. I’ll show you how you can use a beer can to make metal shims, and then easily install those shims to achieve a nearly perfectly flat printing surface on your Prusa. I will also discuss the reasons to do (or not to do) this, and compare this method to the fairly popular “Nyloc Nod”.
Raspberry Pi Based OpenWRT Router/Firewall Using Tagged VLANs
Raspberry Pi’s main downside (as far as using it as a router) is that it has only one Ethernet port. This can be overcome by using a USB Ethernet dongle to get an additional Ethernet port. I did not like that idea, because USB dongles are not designed for 24/7 operation. I stumbled upon a forum post that suggested using VLAN tagging to carry two virtual interfaces through the only Ethernet port of the Raspberry Pi, thus eliminating the need for the USB dongle. This article is a quick how-to for setting that up.
Repair Sidewall of a Tubeless Tire
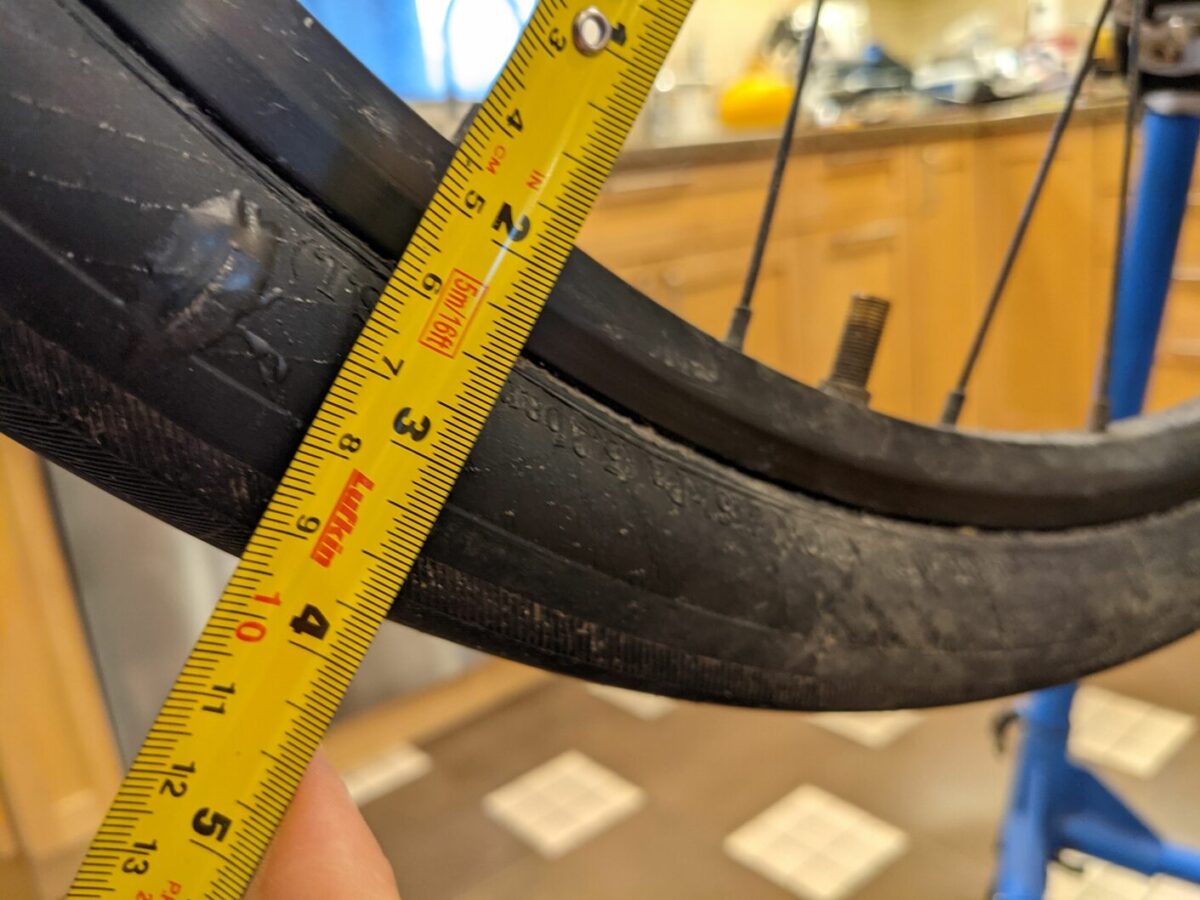
I have a pair of Snoqualmie Pass tires on my road bike, set up tubeless. I absolutely love them, but I got a small cut on the sidewall of the rear tire. The tires still have a lot of life in them, and, considering that they are not so cheap to replace, I decided to try repairing the cut.
[Update 4 months down the road – May 2021] The repair is holding just like the day I made it.
3D Printed Flying Spaghetti Monster Tree Topper
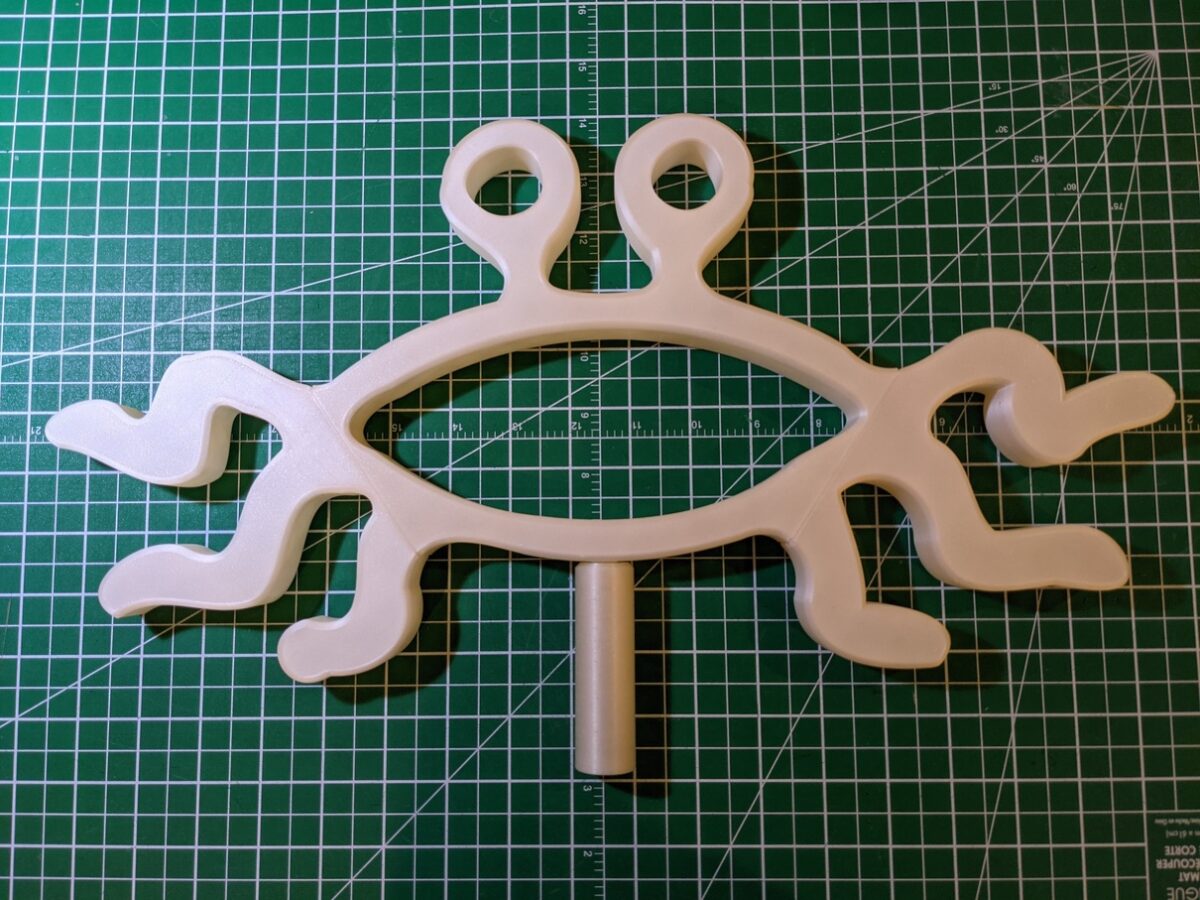
I designed and printed a large New Year tree toper of Flying Spaghetti Monster emblem. This post is to share the devine noodly goodness (or is it godness) with the world. My 3D printer can print up to 25 cm by 21 cm, so this model is split in three parts to be glued together.